Tuesday 16 April 2013

Soundtrack

Recently I have done work on the soundtrack. I had very specific ideas for the soundtrack which I believe i have succeeding in realising. Through the use of Reaper I manipulated tracks to get the sound I wanted.

The tracks for exploring the and wandering through the game while out of combat I had very specific ideas that I succeeded in executing. I knew from the very beginning; I wanted Pokemon tracks but not the 8 bit sound. I found the exact tracks I wanted so it was just a matter of editing them. The reason I wanted this music was because I have always admired it from a young age, and it always struck me as surprisingly atmospheric, even considering technological obstacles. The main change I needed to do was to male sure these tracks were slow, almost to a crawl, to represent what the player was experiencing; a dungeon crawl. Also I lowered the tracks down an octave to give it an earthier bass sound, again, representing the environment. Threw in some reverberation too to make it echo as it is set in a cave.

For the credits song it had to be a heavy metal rendition of a theme song and I thought what better than the Elder Scrolls theme? It's vast and epic and perfect for our game.While I would have liked to perform it myself I lack the technical ability. So I found exactly what I wanted after some sleuthing, and it was perfect. There's something about it that just instills a sense of victory and power and I thought that would be great for players to experience after completing the game, as that is how the player should feel upon beating the game, any game for that matter.

So while my soundtrack work is pretty much done unless there are any issues, I may continue and do more. Who knows, I could come up with something cool that could work with the game. I think I'll continue to experiment.

Cheers everyone.

Thursday 11 April 2013

Sound Effects

So for Beards & Axes another task I had was to create sound effects. The most logical first step was to create a list of sound effects that I felt were needed for the game, as follows:


  • Footsteps (Earth/Rock)
  • Footsteps (Wood)
  • Weapons clashing
  • Weapon successfully hitting
  • “Button has been selected” sound
  • Low health sound
  • Door opening/closing
  • Potion drinking
  • “Just picked up loot” sound
  • “Battle has begun” sound
  • “Battle ends” sound
  • Weapon Swinging
  • Game Over
  • Wilhelm Scream
  • Enemy Spider Attacking
  • Enemy Spider Hitting

In one sitting I managed to make all these sound effects. By using Reaper I manipulated individual tracks to create the sound I desired. Currently we are learning to use Reaper but I have used it quite extensively a number of years ago when I was doing and evening course in Sound Engineering, and also as hobbyist guitarist recording original compositions so I believe I had a good advantage in this area.

The tracks I used were a mix of my own original recordings that I recorded a while back for an assignment, and some tracks I found online which I used because the sounds I required were unrealistic for me to record myself, and i would not have had the means to do it myself.

Next up, the Soundtrack!

Wednesday 10 April 2013

Texturing The Models

One of my most recent tasks was to texture the 3D models that I had already made. This at first proved to be quite daunting, as I had made roughly 40 models. The sound of texturing 40 models, as you can imagine does not sound like fun, and would be even less when actually doing it.

My conclusion? Not too bad at all.

Now I'm not great at texturing, at least wasn't before I began this, but it proved to be a good learning experience in improving my work rate, and my fluidity while texturing. Less mistakes were being made as I went along.


^ Not bad eh?


^And another

I was thrilled when I actually managed to get all the texturing done in one sitting (albeit one, which I forgot about due to delerium via exhaustion). I thought getting it done in the one sitting would make the most sense as time is a precious commodity at the moment.

Look out for another blog post or two on the topics of Sound Effects and Soundtrack.

Cheers!


Character Weapon Mounting

Being an RPG, we need weapons. But while weapons sitting in a nice rack is all very well and all, this is not Skyrim, so kitting out your Whiterun house with lovely looking weapons that you'll never use is not our focus here.

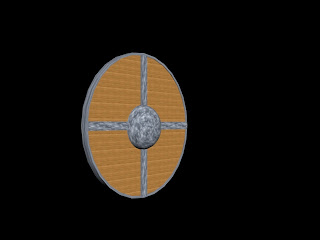
Paul M created a collection of weapons for our character to us, with pickaxes, doubled bladed and single bladed axes as well as a few other objects that could be used for bashing. Also included was three different types of shield. My problem was getting our character to use them.

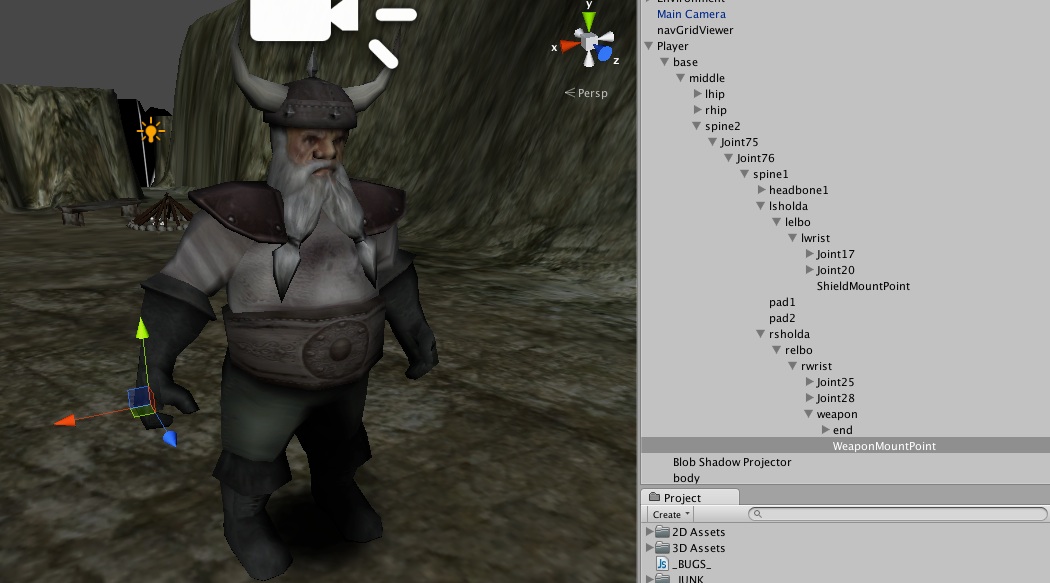
After a push in the right direction from our constantly helpful lecturer, I discovered mountpoints. These are essentially empty gameobjects where the weapon will instantiate when we need them to. These can be placed all over our character where we need them, but for our current schedule we will be sticking to weapons and shields; the right and left hands.

After some research, I decided to add the empty gameobjects directly in Unity. While this could be done in 3DS Max as well, including doing more complicated things with bones etc, with the Dwarf model not being my own, and time contraints, I didn't want to go messing with it if I could avoid it.


As stated, weapons and shields will then be instantiated at the postion of these mountpoints. A useful feature too is instantiating them at the same rotation of the mountpoints. As each of our weapons will be held in the same way, this is very useful. While initially tedious and needing some trail and error to postion the mountpoint correctly, after plenty of testing, they were working exactly the way we wanted them. Parenting the instantiated weapon then to the mountpoint (done in the code) meant that each weapon would animate along with the character. While all our weapons use a simple chop animation, items like spears could be done in the same way. The spear would go to the mount point, and then the code would point the character to a separate 'thrust' animation. This means that when creating a character, you would be animating only individual actions, not individual animations for every single weapon in a game. 

For anyone looking to do something like this,  a simple piece of advice is to have all your weapons in your modelling programme at (0,0,0) and at the same rotation.


Once the weapons were coming in at the right place, rotation and animating along with the character, it was a simple matter of making the weapons function, ie, change the code in the player stats so each weapon does different damage. After a brief chat with Petr, who is doing all the actual equipping and GUI code, we decided it would be handier for me to do this, as then we could have all the weapon code in one separate file, with each weapon or shield with its own individual function. Then on Petr's end, it would be a simple matter of calling each function from the weapon code file when it is equipped in the inventory system. Here's an example of one of those functions:


function EquipSingleBladedAxe1 (){

      Destroy (mountedWeapon);

    var axeSingleBladedInstance : GameObject = Instantiate (axeSingleBladed, weaponMountPoint.transform.position, weaponMountPoint.transform.rotation);

    axeSingleBladedInstance.transform.parent = weaponMountPoint;
    mountedWeapon = axeSingleBladedInstance;
   
    playerStats.weaponLowRange = 1;
    playerStats.weaponHighRange = 6;

}

An important part worth noting is the 'mountedWeapon' variable. This is so the code knows what is currently mounted by the character, so that when he goes to equip a different item, the currently equipped item is removed. 
The weapon damage is then in the two range variables at the bottom  — in this case, this weapon will do between 1 and 6 damage each hit. This is then added to the character strength giving the final damage output, from which the enemy armour class is deducted giving the actual damage dealt.

The shields work in a similar way, only they affect the armour class stat of the character. While originally we only had the one armour class variable, I split it into various elements while doing this. While for this assignment, we will only have shields, and hence will only need the one armour class variable, in future if we were to add armour, gauntlets etc I thought it would be handier to spilt out each and then bring them together in a forumla.

So for example, if a character had a knight shield (Shield AC 3) plus heavy armour (Torso AC6), adding these together would give a total armour class of 9. Then if the player was to equip the great knight Shield (AC 5), the character's armour would be 11. If we were to have all the armour in just one AC stat, and the add or take away integers from that, it would be too easy to end up with a situation where once you equip something, a permanent or semi-permanent change to the AC stat could be made.


The Cast List. Now looking pretty.

Another long one here. The last couple of weeks from my end have been on the characters; our spiders and ever patient Dwarven hero, who had been sitting on the sidelines for far too long.

Firstly, our spiders. The problem I discussed here a couple of weeks ago has been fixed. While still not 100% sure what the problem was, I narrowed it down enough so I could fix it. The main issue was with the .fbx export, where the skin were coming away from the spider bones on one side. The bones still animated the legs, but because the legs were off line with them, the legs animated into the spider. I'm pretty sure that this was due to way the spider was modeled. Not everything was fully attached, and the legs and torso objects were separate meshes. Though why this only affected the legs on one side, I still don't know.

But that's been fixed now. The spider had to remodelled in places so it forms one complete mesh, with each vertice connected, extra edge loops added to the leg joints as well as numerous other minutia that's far too boring to go into. Unfortunately this meant that after all that had been done, it had to re-rigged and re-animated which took up more of our ever decreasing time.


So we now have two different types of spiders, with the brown one pictured above a slightly flatter version of the smaller ones. A simple material was added to each to give them some distinction. In future for my own portfolio of work I will probably add a more detailed material, with eyes, fangs and more stylish abdomen, but with the view point of this game being the way it is, none of these features would be visible. So for time reasons, the spiders have been left as they are.


On to our character. With the deadline being the way it was, it was felt that we didn't have time to rig and animate an entirely new model. I attempted rigging Paul M's Dwarf character, but editing the envelopes was taking a lot of my time up, and I would not have been able to get that done in time. So a simple dwarf character was found online here that was already rigged and animated, which saved us at least a couple of days work and allowed me to focus on character equipment and stats.

Of course, things are never that easy, as the .fbx version of the Dwarf was missing his head.


One of those bizarre problems. But it could be worked around. The dwarf character also came with .obj versions of the model (which is simply the unanimated mesh). From this file, I detached his head and brought it into the .fbx version of the file. To this file, I then added some head bones, skinned them to the head and then attached both the bones and head to the headless dwarf. Amazingly, this all worked out perfectly.

This character came already with all the animations we needed and some extras too which was great, and saved me days of work.


Following this post will be another one, going more in-depth into the character and equipment mounting.


Thursday 28 March 2013

GUI - Health and Mana Bar

Today i was working on another part of GUI for our game. I created Health and Mana bars inside a GUI.Window. Interesting thing about GUI.Window is that for each window you need a unique ID number which you will be using as a parameter in your function.
Here is code snippet form my GUI script, it's nice and simple.


I was using Event.current to see if my Hp and Sp values are changing. Later on we will have to modify this script to be able to use Paul's PlayerStats script. Health bar is also dragable same as Inventory window which is giving User an option to position all GUI panels in a way he/she likes it.

And this is how it looks like in the game now.


 I'll keep you posted with more upcoming GUI.

Wednesday 27 March 2013

GUI Inventory part 2

It's been a while since my last post about GUI, so here is a little recapitulation on what i have been doing. There is a massive amount of things one can do in GUI., one from the things i learnt is that not everything does have to be in OnGUI() function. Another handy thing to use was a discovering a UnityGUI event which i used instead of Input.GetKeyDown.

Events correspond to user input, or are UnityGUI layout or rendering events. For each event OnGUI
is called in the script; so OnGUI is potentially called multiple times per frame.
Event.current corresponds to "current" event inside OnGUI call.


I have also loaded CSV files into my inventory GUI and used their values to be displayed in Inventory window.There is still a lot of work to do but it's getting to look well i think.
Thanks to Noel items can be now moved from Loot objects into Inventory, which was a problem for so thanks for that. I will discuss Loot script and chest object in a next post.